| Line 31: | Line 31: | ||
==Platform Components== |
==Platform Components== |
||
[[File:ios_platformcomponents.jpg | center | 600px]] |
[[File:ios_platformcomponents.jpg | center | 600px]] |
||
| + | |||
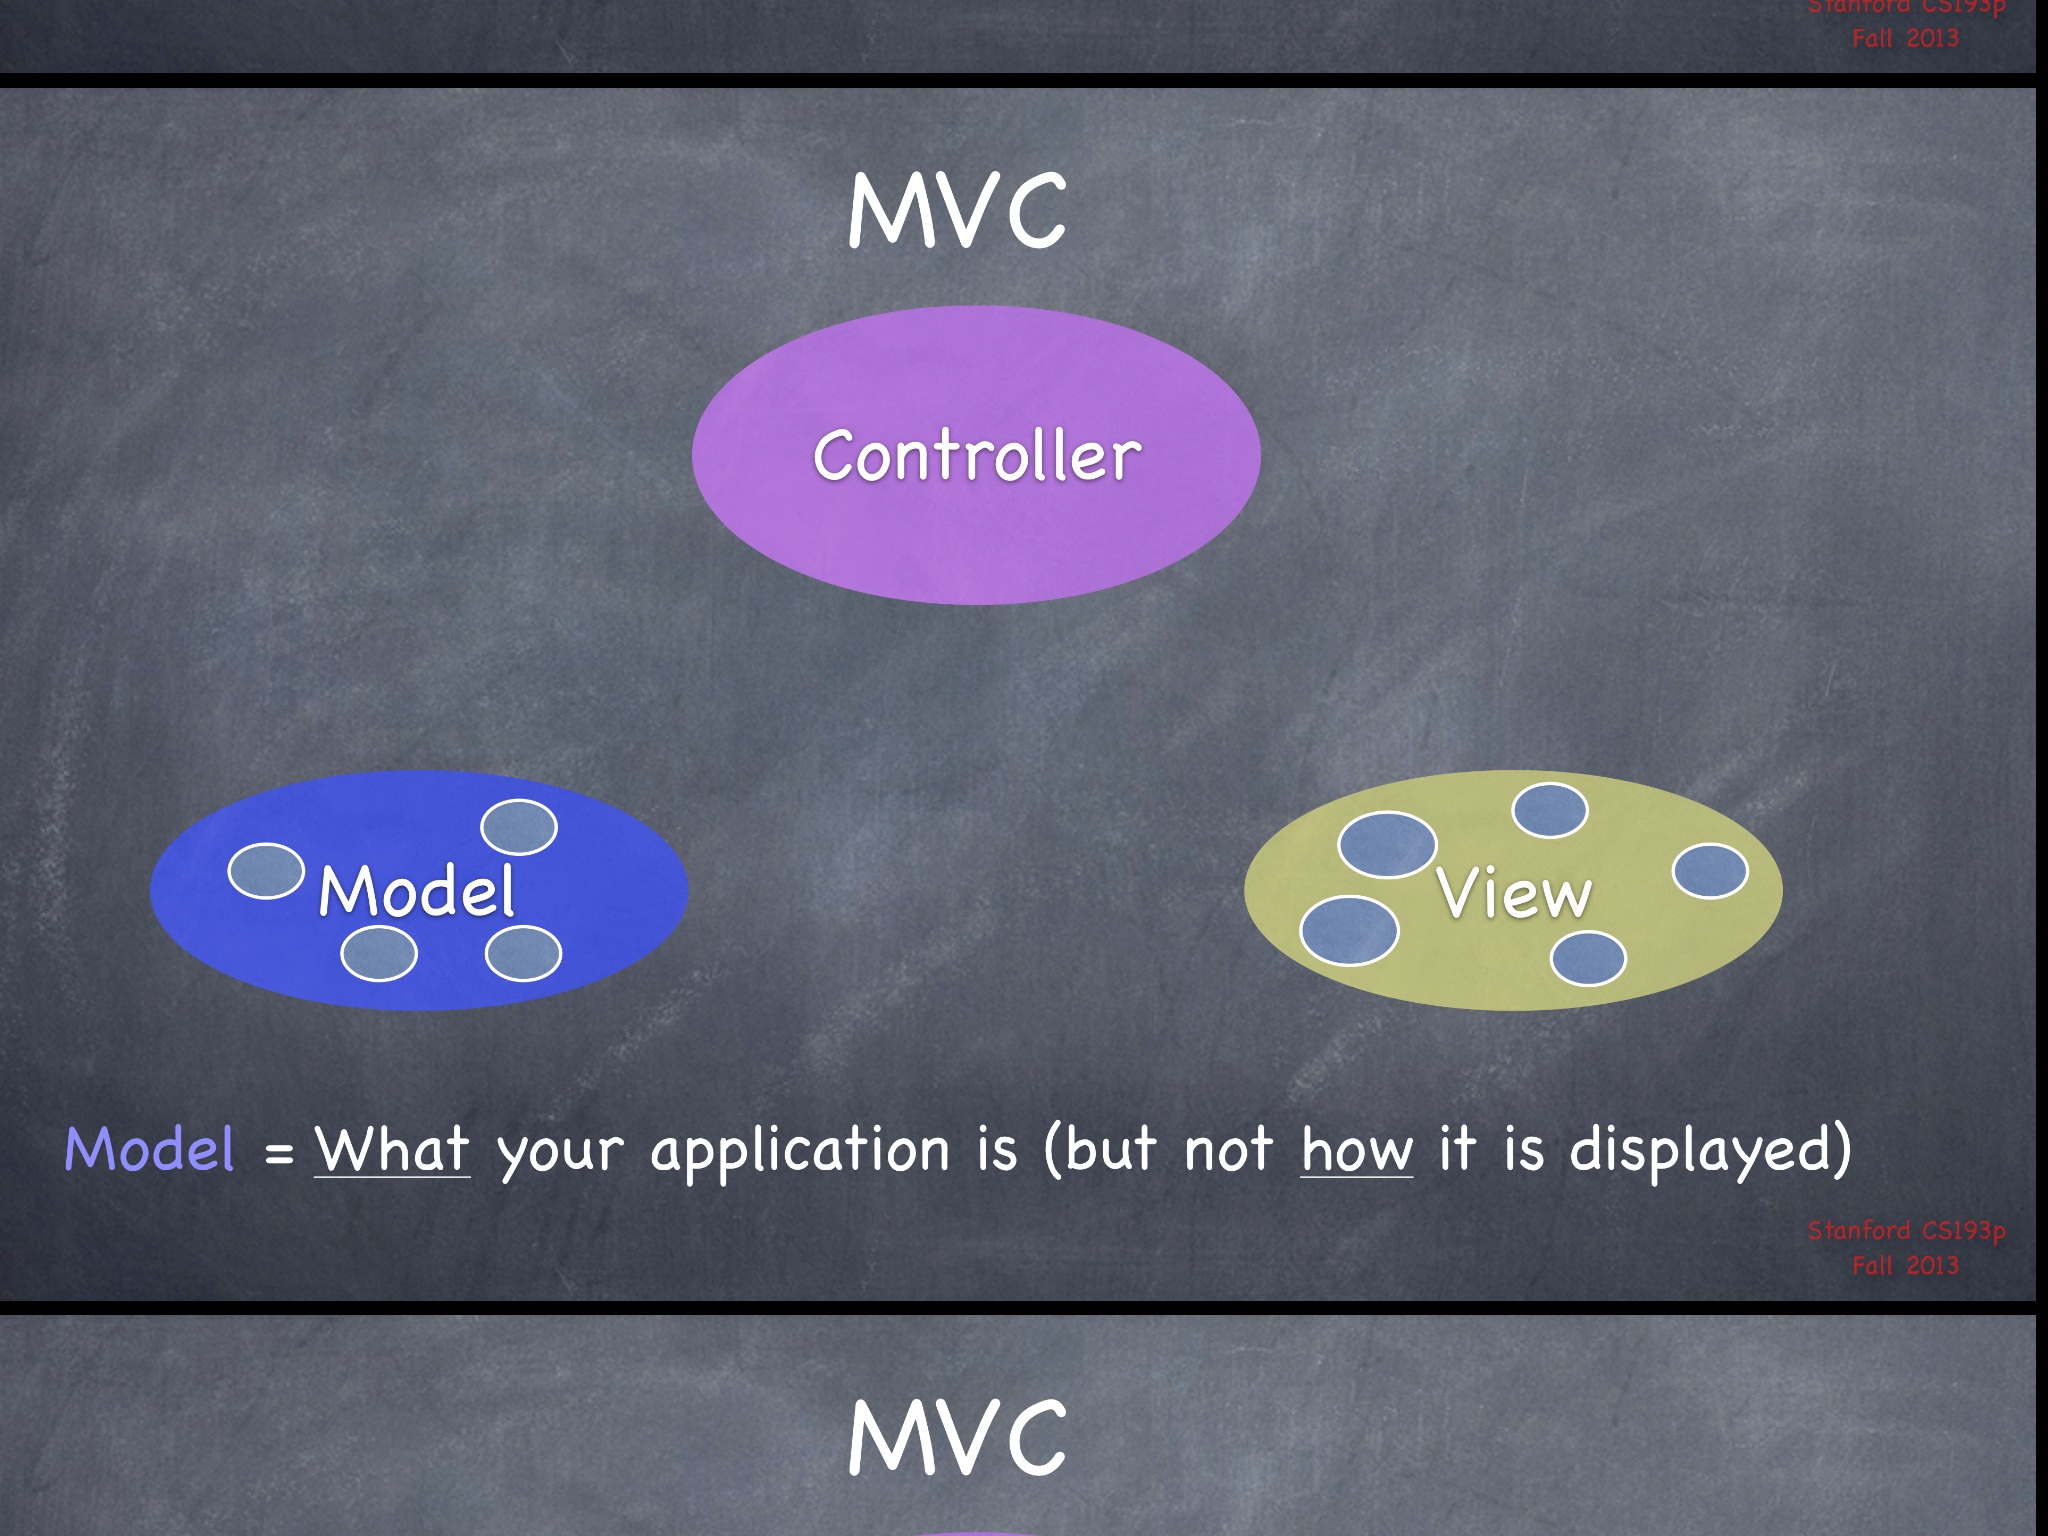
| + | ==MVC == |
||
| + | ===Model=== |
||
| + | * Model = What your application is (but not how it displayed) |
||
| + | [[File:ios_mvc_model.jpg | center | 600px]] |
||
Revision as of 06:34, 8 February 2014
Xcode change target name
below step works for Xcode 4.6.2
- in Xcode click project icon, in TARGETS direct edit target name, such as: change change ipadcn to cn_ipad
- in Build Settings -- Package, change the Product Name, such as: change ipadcn to cn_ipad
- Xcode close project, delete the xcode auto generate files, such as: *.xcscheme, ..., Xcode Re-open the project
- If you meet Simulate error "failed to attach to process id 0", you need clean Simulator content.
- reset simulator: in menu iOS Simulator --> Reset Content and Settings...
- back to xcode, in menu Window --> Organizer --> Projects --> Delete Derived Data
find iOS simulator location
- Go to ~/Applications, and right-click Xcode.
- Select “Show Package Contents”. A folder opens.
- Browse through the folder structure to “Contents/Developer/Platforms/iPhoneSimulator.platform/Developer/Applications/”
- There you’ll see the “iOS Simulator.app” — it’s best to add it to the dock, so that you do not need to go through these steps again.
- Close all the folders, as you won’t need them to use the iOS Simulator.
- Start iOS Simulator from the Dock.
What's in ios
Core OS

Core Services

Meida

Cocoa Touch
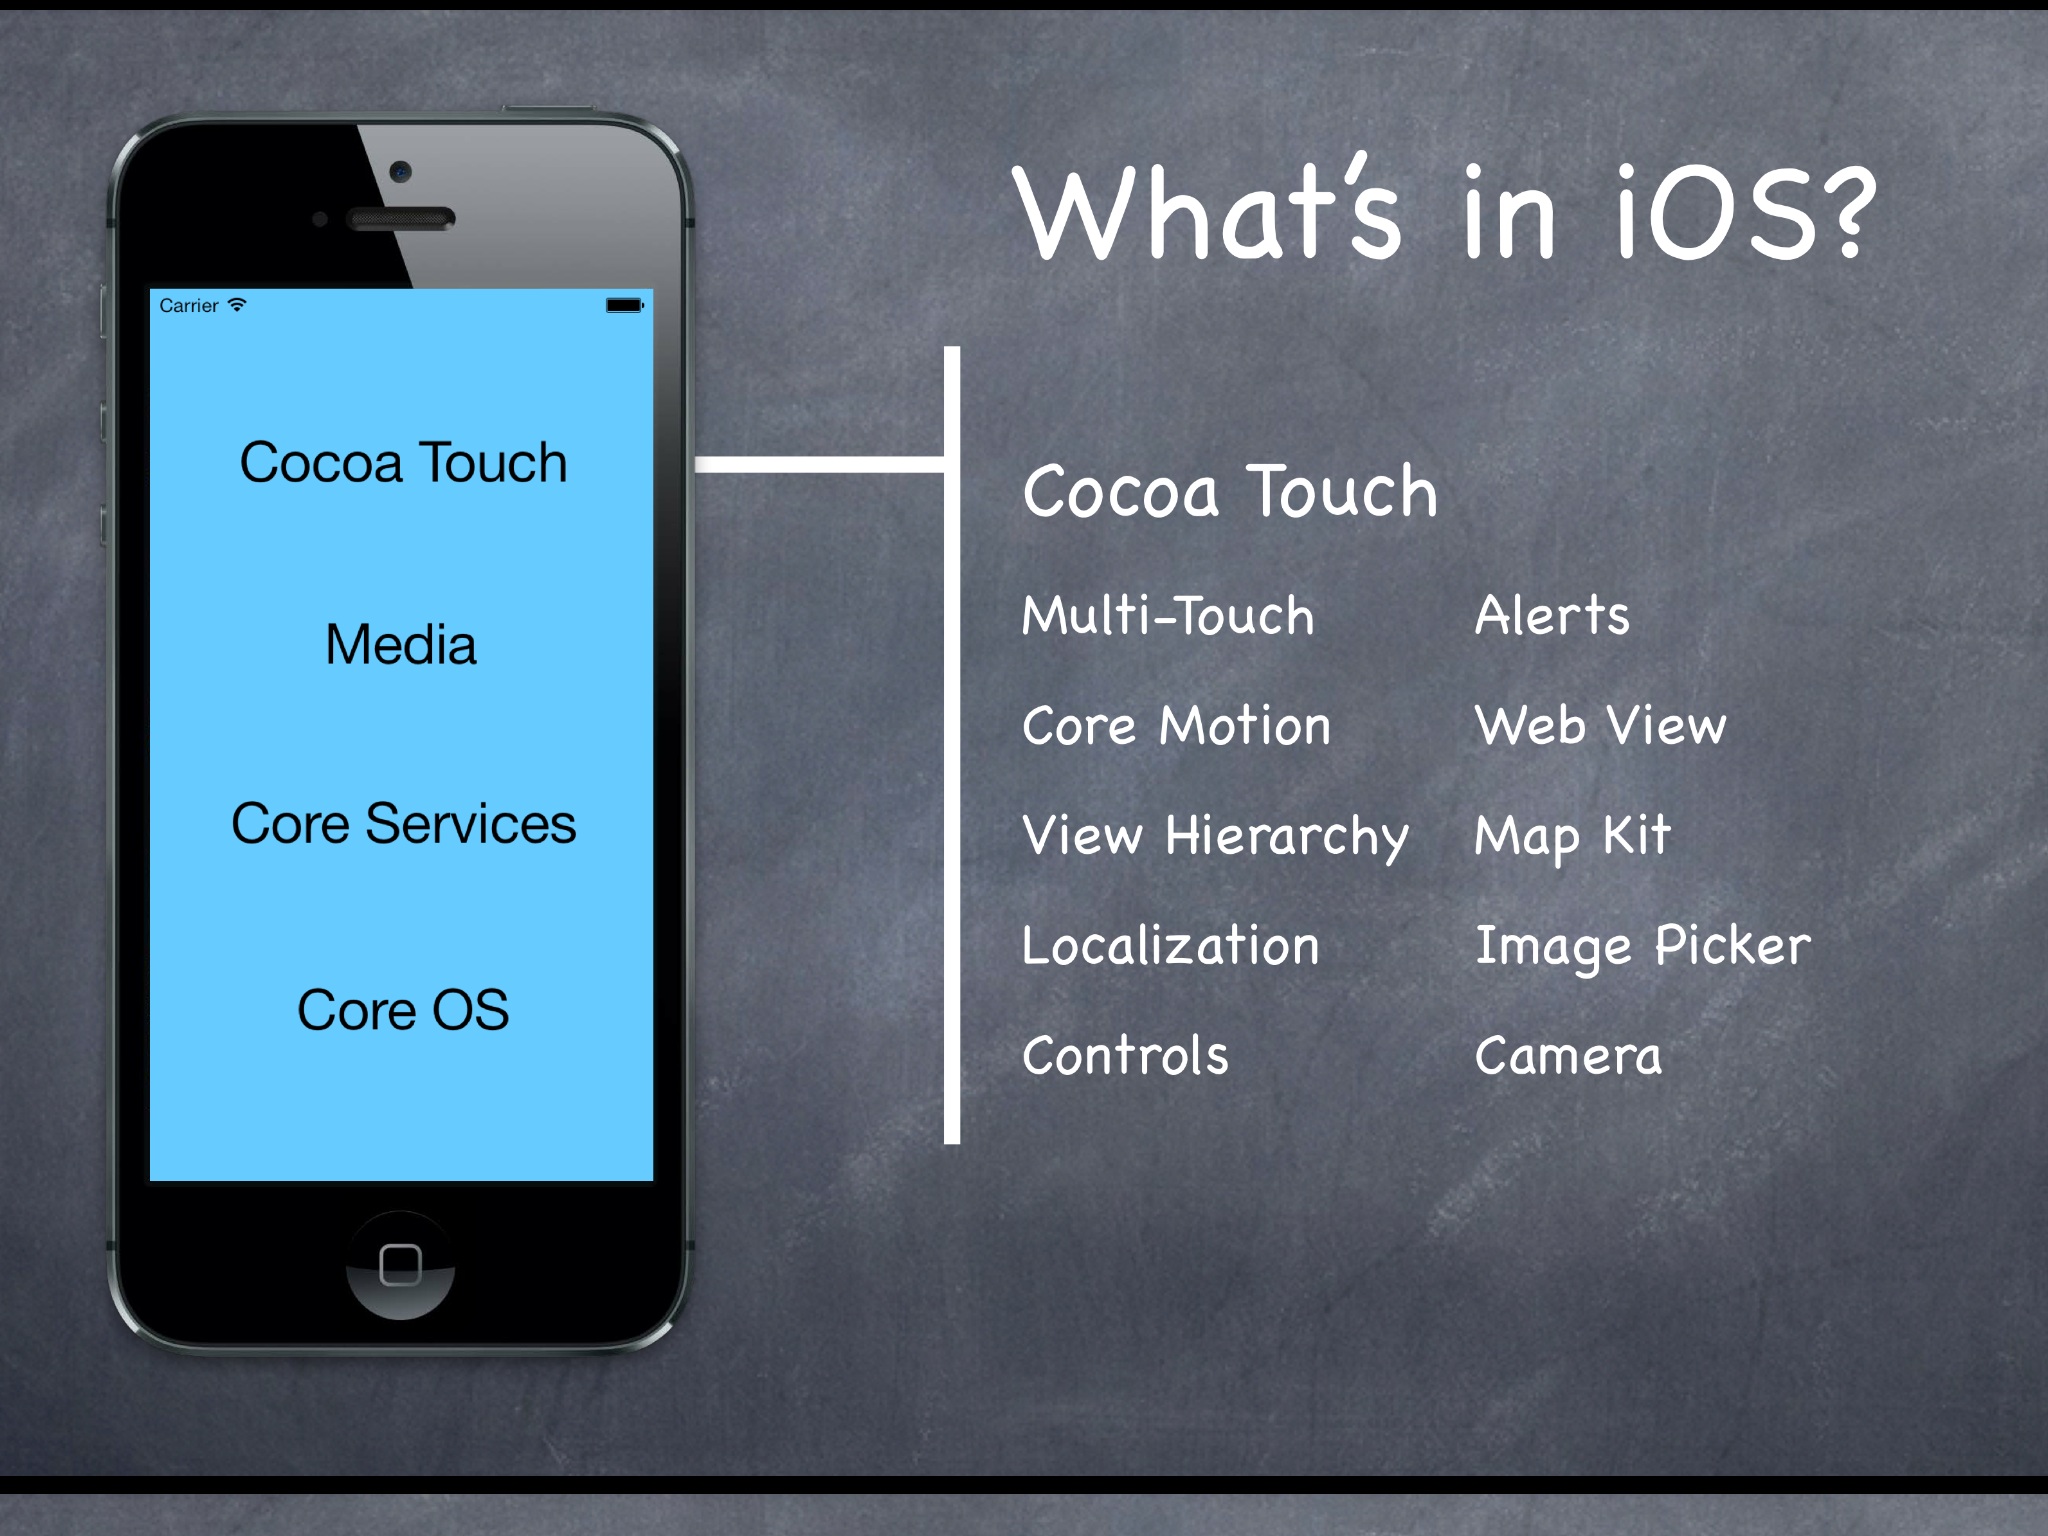
Platform Components

MVC
Model
- Model = What your application is (but not how it displayed)